


July 1 - September 30
Download to use offline.


HELLO!
Thank you SO much for registering as a home pizza-maker for this year’s Summer Slice-a-thon!
We’re thrilled that you’ll be doing #Pizza4Good by hosting a pizza party this summer. As you already know, 100% of the funds you raise will cover pizza deliveries to shelters and soup kitchens across the country through our Pie it Forward program.
Summer Slice-a-thon is made possible thanks to King Arthur Baking Company.


TABLE OF CONTENTS

Don’t miss out on the opportunity to win wine, pizza, and cinema goodies from Francis Ford Coppola Winery.


RESOURCES
We made this program extremely flexible so you can host a pizza party in whatever way makes the most sense for you. To give you a few ideas, you can:


Host a party in your home or backyard with a few friends and neighbors
Pop up at a local brewery, community event, or pizzeria


Offer pizza pickups to neighboring apartments with a QR code on the door for donation collection (we provide the QR code!)
Team up with other home pizza makers, bakers, or BBQ pitmasters in the community to host a party together
We want to make sure you have all of the resources you’ll need to make your Summer Slice-a-thon participation a success. We’ve created a folder that contains ALL of the resources that you’ll need to get the most out of your pizza party.

Your event can be as big or small as you want. The important thing is that you’re bringing your community together with your love of pizza!


Your Social Tool Kit
This Resource Folder is filled with digital assets that will help you spread the word about your participation in Summer Slice-a-thon. You can use the templates and photos that we’ve provided or create your own.
Share your party details with your friends and family
Use pre-made post’s provided by us, or customize your own.


We’ve also created a folder that contains a link and QR code for your personal Donation Page. You can share this link via social media, text, or email. You can print the QR code for display at your party; it links to this same donation page. Your folder is listed alphabetically in the folder below, which is organized by the name that you submitted for your party.
We hope that you have a fantastic time at your Summer Slice-a-thon event. Thanks for working with us to make some hot pies for a cool cause.
If you opted in to work with an experience home pizzaioli mentor when you signed up, they’ll be in touch with you by email. Otherwise, don’t hesitate to reach out to us with any questions at

Claiming your FREE Pizza Course
King Arthur Baking Company is giving you exclusive FREE access to their on demand Classic New York-Style Pizza at Home Series so you can learn from their experts. This 6-lesson series with Martin Philip and resource booklet covers everything you need to know about making a classic 13-inch New York style pizza, all with equipment you already have in your home kitchen. Click the button below or access using the link in your Welcome Email.
Access On-Demand Pizza Class
Click the button to access
Create your King Arthur Baking Account
Use the promo code slice-out-2026 to get your free access
Did you know?
Flour sold by the King Arthur Baking Company has never contained bromate.


PIZZA
Basics
Dough Stretching
There are infinite dough stretching techniques but this is a great overview. The following steps are from a class we hosted with John Arena of Metro Pizza in Las Vegas, NV. Keep an eye on our social @sliceouthunger for more video tutorials about dough throughout the summer.
Lightly coat your dough stretching surface using a 50/50 mix of semolina and white flour.

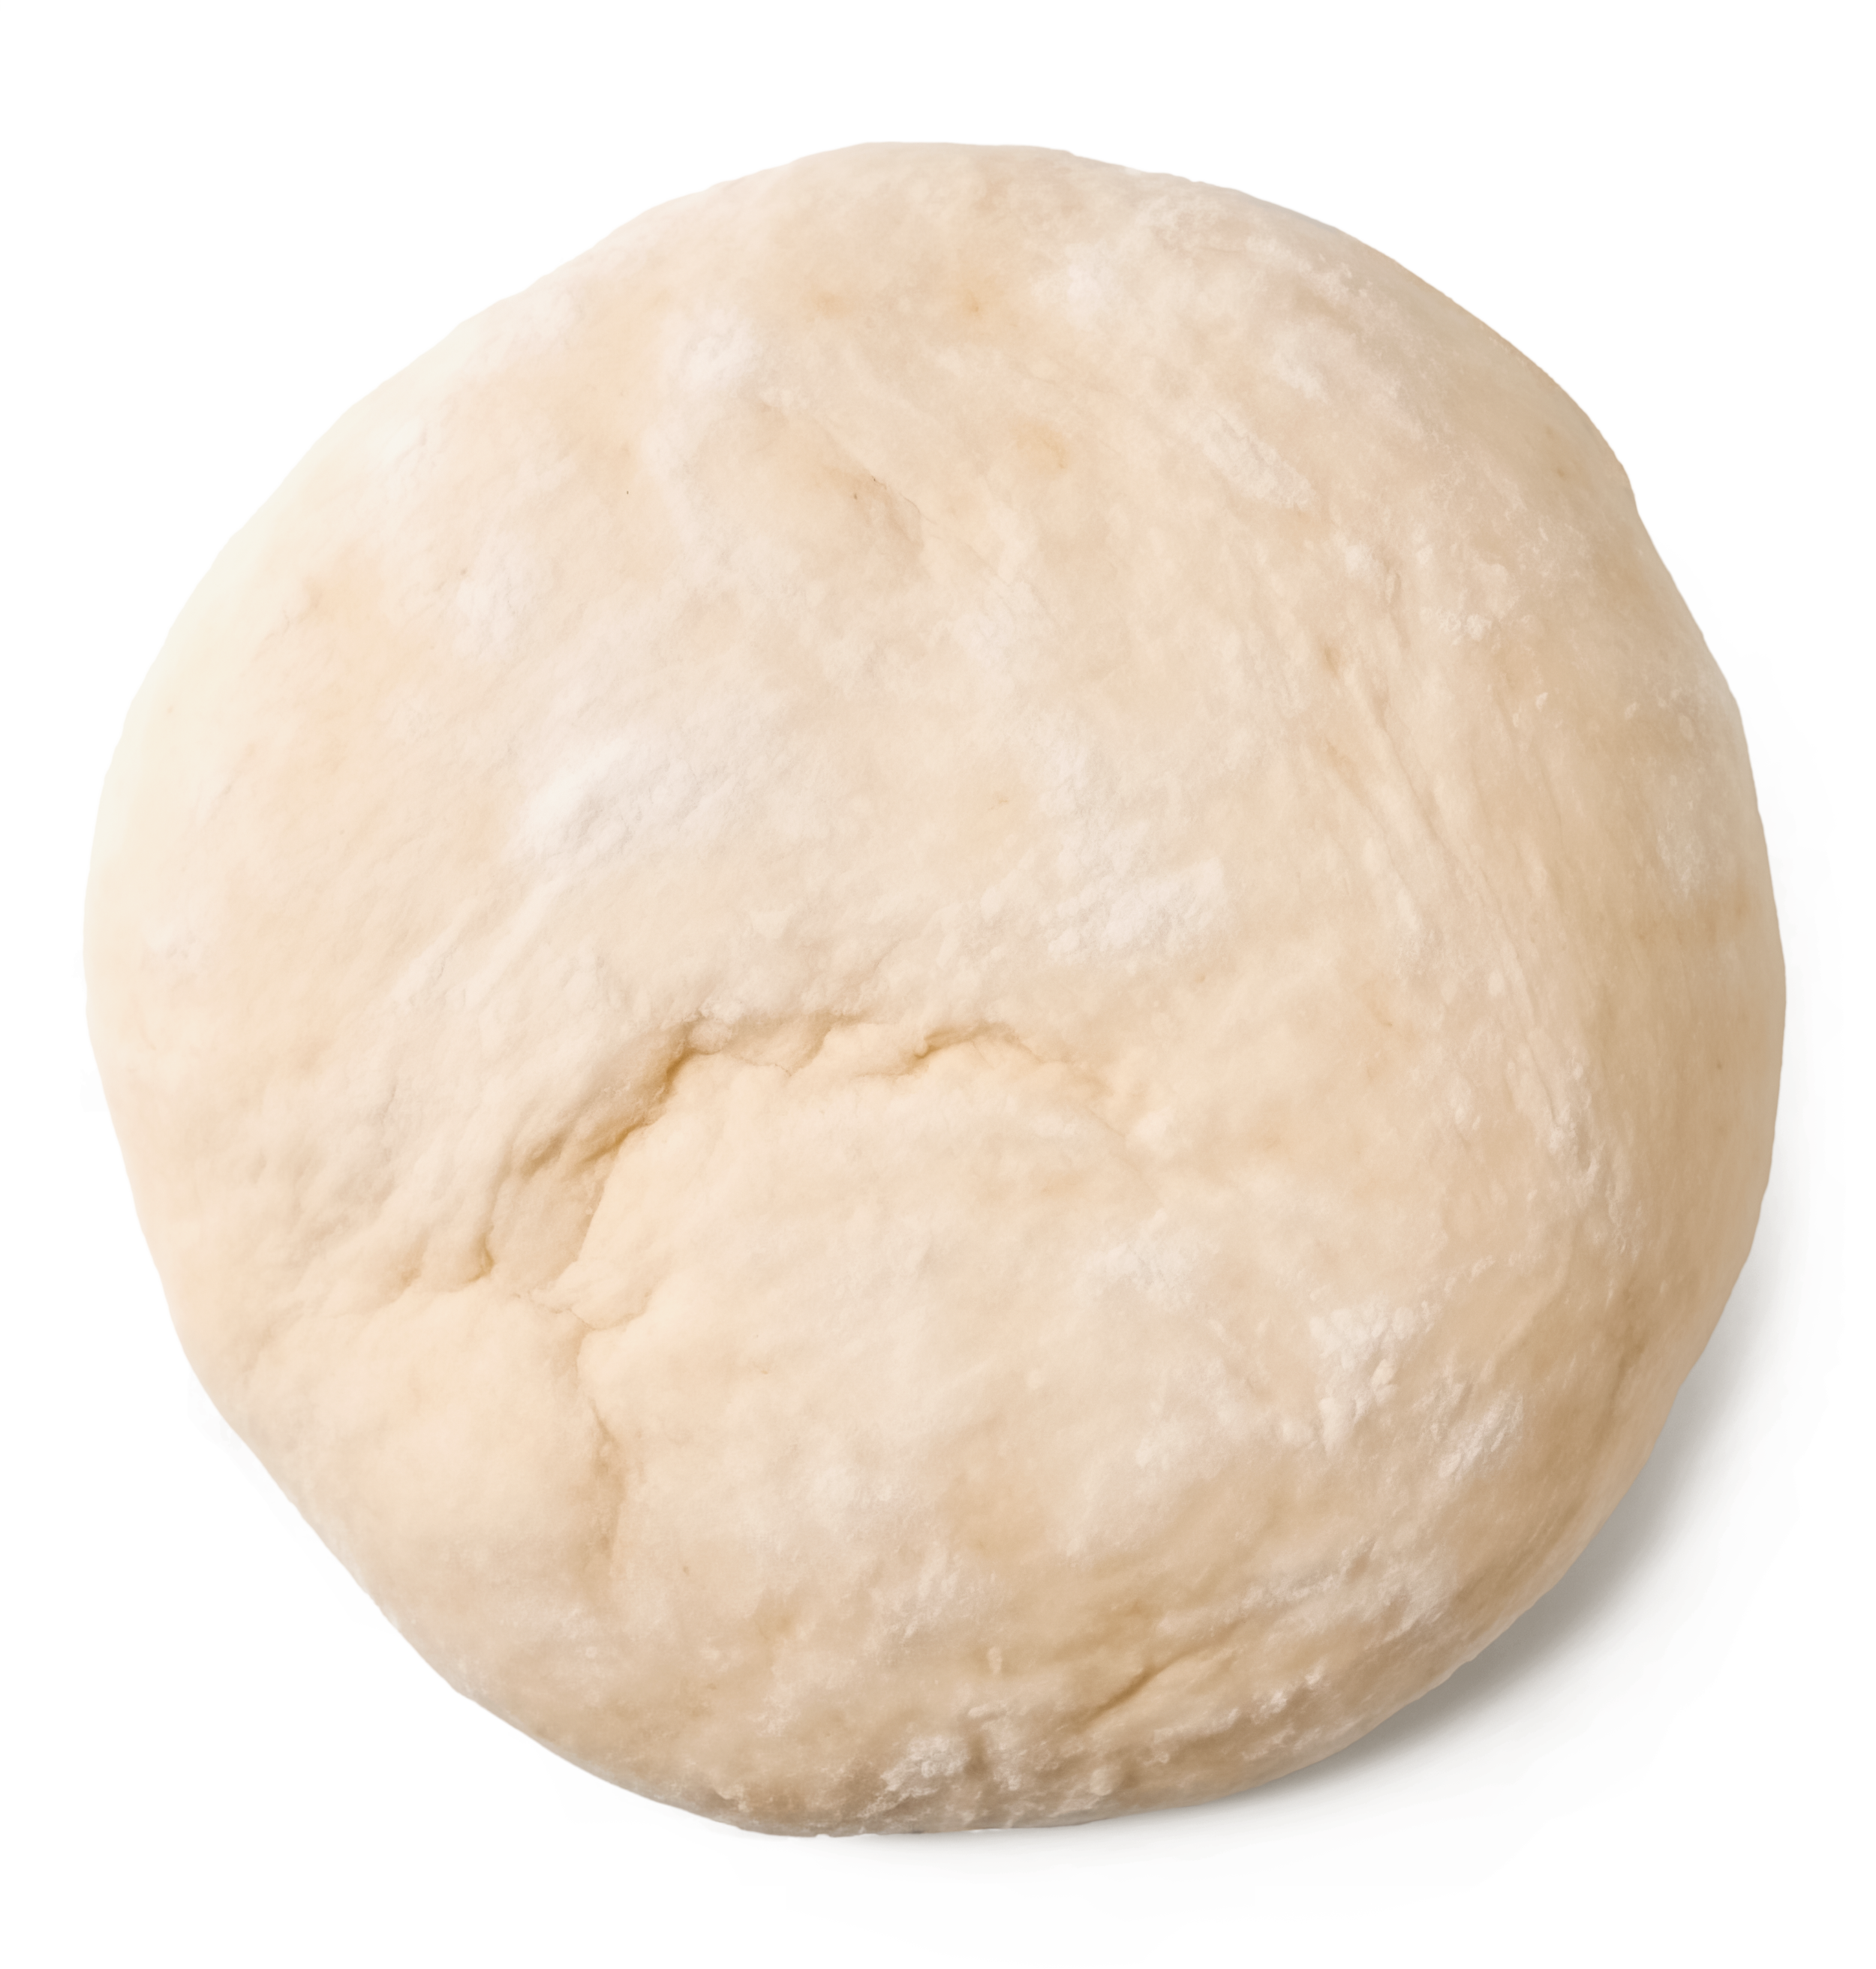
Place one dough ball onto your floured surface making sure the bottom has an even distribution of flour.

Using two fingers on each hand, pat the center of your dough ball to gently push the air trapped in the dough away from the center. Continue this motion in circles radiating outward from the center towards the outside edge of the ball, leaving a ring on the outside edge that will eventually form your crust. Make sure that the thickness inside your crust ring remains even.

Once you’ve pushed the air toward the outside edge, pick up your dough and re-dust your stretching surface.

Gently press your fingertips on your nondominant hand towards the inside edge of your crust. This hand will remain in place as a guide while your dominant hand stretches. To stretch your dough, use a circular motion to pull your dough towards you in approximately quarter turns. Make sure that the thickness inside the crust ring remains even.

You’ll be done stretching once you’ve reached the appropriate size for your dough ball.


Did you know?
The Italian flour identification scale refers to extraction, not protein.

Types of Ovens
Any oven can be a pizza oven! There are two main categories of ovens that we’ll be discussing in these recipes: conventional home ovens and high temperature ovens.
When we refer to a home oven we’re talking about typical gas or electric ovens that reach 500°F .
When baking pizza in a conventional home oven, best practice is to use a baking steel or pizza stone, but a standard baking sheet also works great (we’ve got a technique for that).
Most of the dough recipes in this book reference instructions for a conventional home oven, but we also have recipes designed for a high temperature ovens. High temp ovens are available in both indoor electric models that reach temperatures of up to 750-850°F and outdoor propane, wood, and charcoal models that can reach up to 950°F. All the recipes we’ve included can be modified for any type of oven; see the next section on Baking Methods and follow any manufacturer's guidelines.


Conventional Oven
High Temperature Ovens
Most of the dough recipes in this book reference instructions for a conventional home oven, but we have also included two recipes with instructions for a high temperature oven.
Baking Methods
Baking Sheet
If you're baking in a home oven without a pizza stone, we recommend the Par-Bake Method. You'll bake the crust with just a tiny amount of sauce first, then add more sauce with cheese and toppings for the last few minutes.
Start by preheating your oven to the highest setting possible (usually 500°F). While the oven is heating up, lightly oil your baking sheet and press your dough into the shape of your choice. This could be a circle for standard pizza or a rectangle for Sicilian, Grandma, or Detroit-style. Oil your hands first so you don't stick to the dough!
Once it's in shape, apply just enough sauce to coat the surface of your dough and bake for 7 minutes (or until you begin to see browning on the edge). Remove your tray of par-baked pizza from the oven, add your cheese and toppings, then put it back into the oven for another 4-6 minutes (or however long it takes before the pizza looks good enough to eat!)
That's it! If you want some extra char, put the pizza under your broiler for 30-60 seconds. Just be careful not to burn it!

Pizza Stone or Pizza Steel
One hour before baking, place your pizza stone or steel approximately 6 inches below your broiler (if no broiler, place stone or steel on the center rack) and preheat at the highest temperature possible (usually 500°F).
Top your pizza as desired, then slide the pie onto your pre-heated stone or steel. Check your pizza after 5 minutes of baking and rotate 180° if one side looks darker than the other. Allow the pizza to bake another 2-5 minutes, removing when it looks good to you. Total bake time will be approximately 7-10 minutes depending on your oven.
If your oven has a broiler at the top, turn it on just before you launch your pizza onto the baking surface and allow the pizza to cook under it for 1-2 minutes, turning the pizza every 30-40 seconds. Then switch the oven back to the Bake setting for the remainder of the bake.
High Temperature Oven
Preheat using the maximum flame height for at least 30 minutes. Every oven is different, but if there's a large exposed flame, you might want to turn it down after you launch your pizza. Keep your eye on the pie and rotate it 90 degrees as soon as the crust sets (usually 30-40 seconds into the bake). Keep rotating the pizza to ensure an even bake and remove when it looks done to you.
PRO

Tips
Precision
Baking is a science; that’s why all of the dough recipes are provided in grams instead of volume measurements. We recommend using a digital scale that’s accurate to at least a tenth of a gram.

Launching Your Pizza
Pizza sticking to the peel? Work faster! The longer your pizza sits, the more it sticks. Moisture will travel from your sauce into your dough and that's bad news. Make sure you only start saucing and topping your pizza when you're ready to put it into the oven. One trick here is to top your pizza with cheese first, then with sauce and other toppings. The cheese will act as a barrier between the dough and your wet toppings.
Still having trouble launching your pizza off a pizza peel? Build it on a sheet of parchment paper! Just be sure to remove the paper as soon as the pizza sets, about 2 minutes into the bake if using a home oven. Parchment paper isn't such a good idea in a high-temp outdoor oven—it's going to catch fire!

Getting Extra Char
Want to get some extra char in a conventional home oven? Use your broiler! Just be sure to keep your eye on the pizza and rotate it to avoid an uneven bake.

Oven Temp Troubleshooting
Pizza not baking properly? Make sure to keep your oven door closed, opening it only when necessary. Conventional home ovens lose lots of heat every time you open the door.

Gummy Crust
Getting a gummy crust? You’re probably overtopping your pizza! Less is more, especially when it comes to ingredients with high water content, such as tomato sauce and raw vegetables.


DOUGH
Recipes


John Arena’s Home Dough Recipe
Yield
Four 250 gram dough balls (10-12 inch pizzas) or Three 333 gram dough balls (14 inch pizzas)
Difficulty Level

John Arena is the co-founder of Metro Pizza in Las Vegas, NV and Truly Pizza in Dana Point, CA. He has long been recognized as a leading figure in the international pizza community and was the keynote speaker at the 2024 International Pizza Expo. The dough recipe he’s provided is simple enough for home pizza makers of any experience level and can be made using a standard home oven on a baking sheet, pizza stone, or pizza steel.
John Arena, Metro Pizza
Las Vegas, NV

Bakers Percentage
INGREDIENTS
Bread Flour 100%
Water (60°F) 62%
Salt (Sea Salt or Kosher) 2.5%
Extra Virgin Olive Oil 2%
Instant Dry Yeast 0.3%
Semolina Flour (Bench Flour)
600 g
372 g
15 g
12 g
1.8 g
As Needed
Place water in a mixing bowl and dissolve the yeast. Add flour and mix for 3 minutes on low. Let the dough rest for 20 minutes

Add salt and resume mixing on low speed for 3 minutes. With the mixer running, slowly add oil and continue mixing until the oil is fully incorporated (approximately 3-4 minutes). Let the finished dough rest for 30 minutes.

Divide dough into 4 equal pieces of approximately 250g apiece to make 10-12 inch pizzas OR 3 equal pieces of approximately 333g apiece to make 14 inch pizzas.

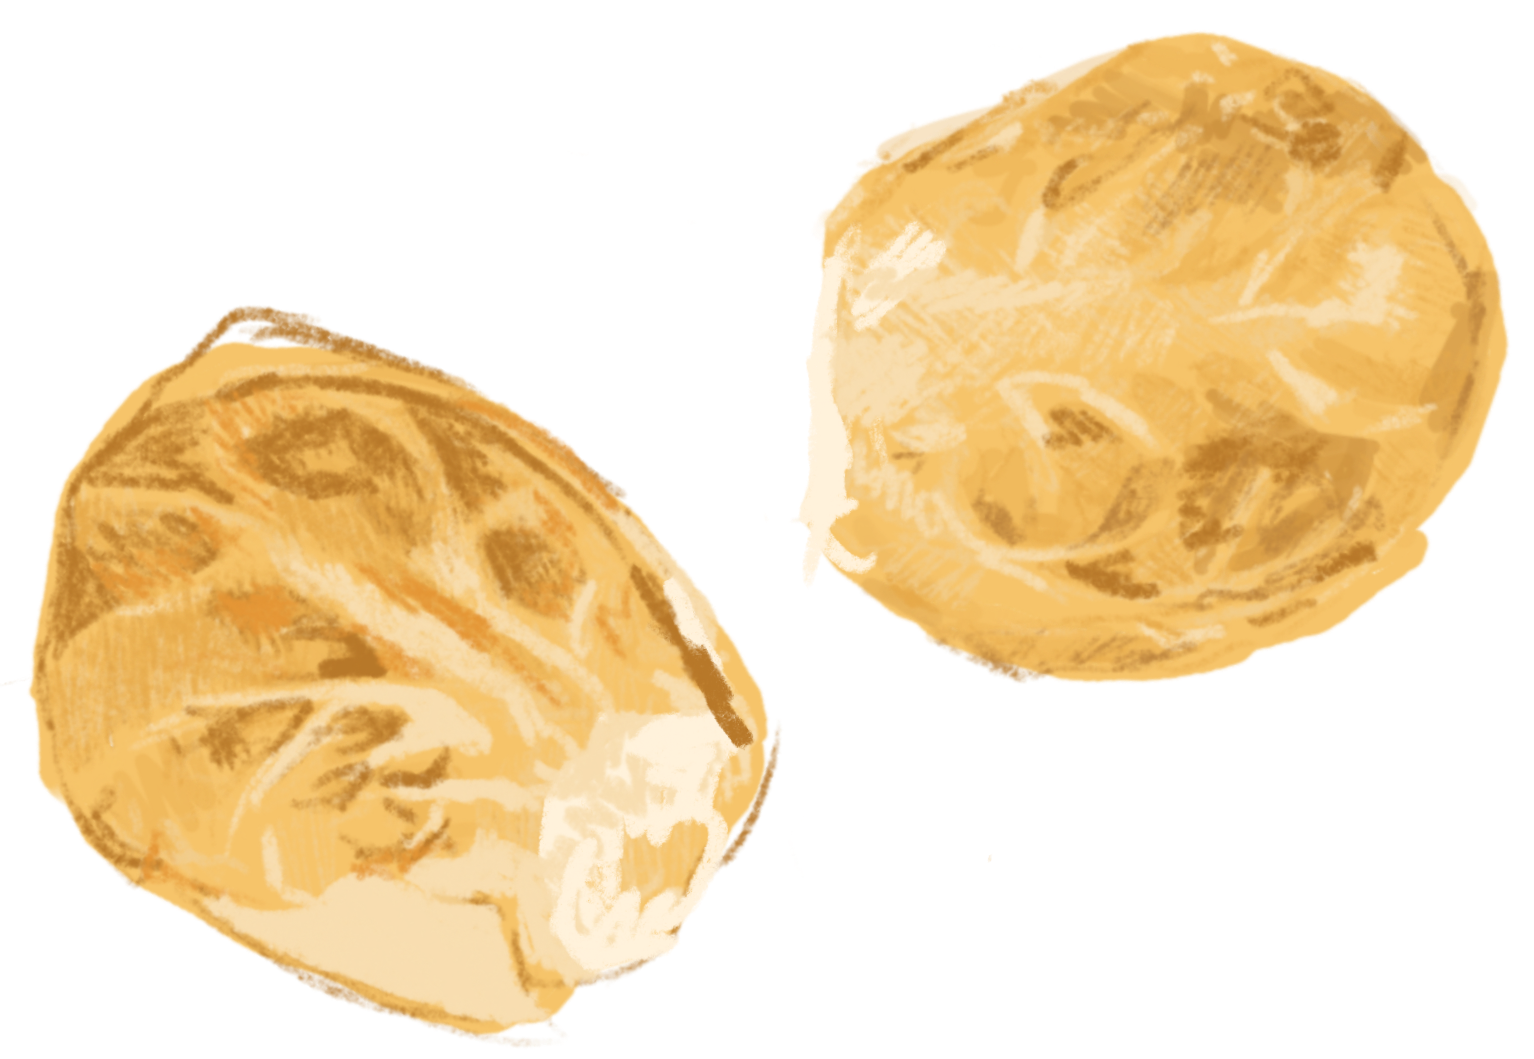
Shape dough into smooth balls and brush with additional olive oil. Place each dough ball in separate plastic containers with a sealed lid with enough space to rise or cover in plastic wrap. Let the dough rise for 30 minutes at room temperature.

Place dough in the refrigerator. The dough will be useable in 24 hours, but will be best after 72-120 hours. Remove dough from the refrigerator and store at room temperature 2 hours before use. Preheat your oven, following the steps specific to the tools that you’re using in the Baking Methods section.

Stretch your dough to a 10-12 inch pie if you made 4 dough balls or a 14 inch pie if you made 3 dough balls. See Pizza Basics Section for further instructions on dough stretching.

Top your pizza as desired and bake following the instructions outlined in the Baking Methods section. You’ll know it’s done when your crust is slightly browned. Finish pie as desired.


Dan Richer’s - Home Dough Recipe
Yield
Difficulty Level
Six 250g dough balls (12 inch pizzas)
Dan Richer is the owner and operator of Razza Pizza Artigianale in Jersey City, NJ and author of the 2021 book The Joy of Pizza. The book focuses on making artisan pizza using a residential oven and grocery store ingredients. His dough recipe is simple enough for home pizza-makers of any experience level and can be made using a standard home oven with a baking sheet, pizza stone, or baking steel.
Dan Richer, Razza
Jersey City, NJ

Bakers Percentage
INGREDIENTS
All-Purpose or Bread Flour 84.2%
Whole Wheat or High Extraction Flour 15.8%
Water 73.7%
Fine Sea Salt 2%
Instant Dry Yeast 0.2%
Olive Oil
800 g
150 g
700 g
19 g
2 g
As Needed
Mix flour and water together until no dry flour remains. Set the dough aside, covered with a clean kitchen towel, for 20 minutes.
Add the yeast and salt to the dough and begin mixing. Knead by hand or in a stand mixer for 6-8 minutes or until medium gluten development is achieved. You’ll know it’s ready when you can pinch off 2 tbsp, flatten it, let it rest for a few minutes, flatten again, pull to stretch it, and then stretch the dough enough that you can see light through it before it tears (also known as the windowpane test). Transfer the dough to a lightly oiled container and cover.
Bulk ferment the dough for a total of 2 hours. Give the dough a stretch and fold every 20 minutes for the first hour, followed by every 30 minutes for the second hour. The dough will increase in volume by 30-40% and will pass the windowpane test.
Divide the dough into 250 g pieces. Gently shape the dough into balls.
Let the dough rest at room temperature until ready to bake (2-3 hours). Alternatively, place it into the refrigerator overnight. If refrigerating, be sure to let the dough come to 78°F before baking.
Preheat your oven, following the steps specific to the tools that you’re using in the Baking Methods section.
Stretch to 10-12 inches.
Top your pizza as desired and bake following the instructions outlined in the Baking Methods section. You’ll know it’s done when your crust is slightly browned. Finish pie as desired.


Ooni’s Classic Dough Recipe
Yield
Difficulty Level
Four 250g dough balls (12 inch pizzas)
Ooni is a high temperature home pizza oven company that launched in 2012. Prior to making pizza ovens, Ooni founders Kristian Tapaninaho and Darina Garland ran an education company and always knew that making fantastic, restaurant-quality pizza at home starts with a solid recipe and understanding of the basics. In addition to this classic pizza dough recipe, they also have hundreds of dough and toppings recipes available on their site. These recipes are intended for use in any high temperature (750-850°F) oven.
Kristian Tapaninaho & Darina Garland, Ooni Pizza Ovens
Edinburgh, Scotland

Bakers Percentage
INGREDIENTS
‘00’ Flour 100%
Lukewarm Water 60%
Sea Salt 2.9%
Instant Dried Yeast 0.4%
613 g
368 g
18 g
2.7 g
Add the water and yeast to a large bowl (or the bowl of a stand mixer) and whisk until thoroughly blended. Combine the flour and salt in a medium bowl, then add the flour mixture to the wet ingredients.
Knead by hand or in a stand mixer. If using a stand mixer use the dough hook and mix at low speed for 5-10 minutes until firm and stretchy. If mixing by hand:
Stir with a wooden spoon until dough starts to form
Continue mixing by hand until the mixture comes together in a ball
Place dough onto a lightly floured surface and knead with both hands for 10 minutes.
Cover dough with a dish towel and leave it in a warm place for 2 hours or until it has doubled in size.
When the dough is ready, divide it into 4 equal pieces. Place each piece of dough in a separate bowl or tray, cover with a dish towel and leave to rise in a warm place for another 30 to 60 minutes, or until doubled in size.
Before stretching and topping your dough, fire up your oven and allow it to preheat for at least 20 minutes. Aim for 850 °F and 950 °F (450 °C and 500 °C) on the oven floor. You can check this quickly, accurately and from a safe distance with an infrared thermometer. Follow the steps specific to the tools that you’re using in the Baking Methods section.
Stretch to approximately 12 inches, lightly flour your pizza peel and lay the base on it. If at this point you see any small holes in the dough, gently pinch them back together. Once you’re happy with the base, add your toppings.
When your oven is hot enough, launch your pizza and cook it for 1 to 2 minutes, turning every 20 seconds to ensure an even bake.

Mike Vaona’s California-Style Sourdough Recipe
Yield
Difficulty Level
Four 290g dough balls (12 inch pizzas)

Mike Vaona is an engineer and home baker who is known internationally as Rosehill Sourdough for his use of sourdough bread and pizza-making. In addition to authoring two books, Baking with Rosehill Sourdough and Pizza with Rosehill Sourdough, Mike has also run pizza popups, consulted with pizzerias and bakeries, and was even the Head of Engineering at Ooni from 2019-2022. He has provided his California-style sourdough pizza recipe that produces a pillowy, chewy dough that can handle a lot of pizza toppings. A pizza stone is not recommended for this recipe; use a cast iron pan or baking steel instead.
Mike Vaona, Rosehill Sourdough
Eugene, OR

Bakers Percentage
INGREDIENTS
Bread Flour (12.7% Protein) 100%
Warm Water 63%
Peaked Sourdough Starter 10%
Salt 3%
Olive Oil 2%
652 g
411 g
65 g
20 g
13 g
6-12 hours before you prep your dough, combine 17g of your sourdough starter with 34g of water and 34g of flour (1:2:2). This will produce enough sourdough starter for your pizza plus 20g.
1-2 days before you plan to bake your pizza, combine water, salt, and oil in a medium bowl. Add your sourdough starter and mix until the water is milky in color. Add your flour and mix until just combined (you can’t see any dry flour). Rest your dough, covered with a clean damp towel or lid for 1 hour. Feed the remaining 20g of sourdough for future use; you won’t need any more for this recipe.
Using lightly wet hands, pinch the edge of the dough in the 1 o’clock position between your thumb, index, and middle fingertips down to your second knuckle and pull the dough a bit and fold over the top of the dough, past the center, and release. Turn the bowl less than a quarter turn and repeat. Repeat 10 times, until the dough starts to take shape. Pinch the side of the dough away from you and gently stretch the dough up and fold it back down towards you, and tuck under, so the seam side is now down and the smooth side is up. Turn the bowl a quarter turn, tuck the edge of the dough away from you by pressing the edge under then pulling towards you, using the side of the bowl facing you as a backstop. Turn the bowl a quarter turn and repeat. Do this a few times until the dough starts to resemble a smooth ball. Rest, covered, somewhere warm, 1 hour.
With lightly wet hands, lift the dough up, and stretch the top layer of dough by gently pulling and tucking an edge under the dough. Rotate and repeat 4-6 times until the dough forms into a smooth ball with the seams tucked underneath. If the dough gets sticky, just set it down and come back in 10 minutes. Rest, covered, somewhere warm, 1 hour. Use the tuck & rotate method again to shape the dough into a smooth ball. Rest, covered, somewhere warm, 2 hours.
If you have the space in your refrigerator to cold proof the dough as individual dough balls, portion four individual 320g dough balls, and re-ball the dough now using a tuck & rotate. Otherwise, tuck & rotate the whole dough, place back into the bowl, then move to the fridge and allow to rest for 38 hours. You can also leave it in the fridge just overnight or for up to 3-5 days.
Take the dough out of the fridge 4-5 hours to let the dough come to 79°F before baking. One hour before baking, preheat your oven & pan/steel to 500°F.
Cast Iron Pan: Carefully remove the HOT pan from the oven and place it onto your stovetop and turn the burner to high. The goal is to get your cast iron to around 500˚F. Stretch your pizza dough to the diameter of the pan and carefully place the dough into the hot cast iron. Immediately remove the pan from the burner. Quickly top the pizza as desired and carefully move into the oven, directly under the broiler. Bake until the toppings are cooked, 90 seconds to 3 minutes.
Baking Steel: Allow the baking steel to continue to heat under the broiler for an additional 15-30 minutes. Your goal is to reach a temperature of 575˚F but your oven may not allow the steel to get that hot, so just go as high as you can. While the oven is heating, stretch and top your pizza as desired on a floured pizza peel, then launch it onto your baking steel under the broiler and bake until the toppings are cooked, 90 seconds to 3 minutes.

High Temp Detroit Pizza Recipe
Yield
Four 275 g dough balls (8 inch x 10 inch Detroit-Style pizzas)
Difficulty Level
Martin Philip, known on social as @Breadwright, is King Arthur’s Baking Ambassador. He has a long and celebrated career of sharing his knowledge of all things baking and has consistently used food as a means of outreach and connection. This recipe for a Detroit-style pizza has been adapted for use in a high temperature pizza oven. You’ll get all the good parts of a pan pizza (fluffy dough, crispy crust, no need to use a rolling pin) without heating up your whole kitchen. Be aware that using a pizza oven is more similar to cooking than baking: You’ll need to be vigilant and adjust the heat and pan position as necessary. For the full method and accompanying tips, please refer to King Arthur’s YouTube video.
Martin Philip, King Arthur Baking Company
Norwich, VT

Bakers Percentage
DOUGH INGREDIENTS
High-Gluten Bread Flour 100%
Lukewarm Water 70.8%
Extra Virgin Olive Oil 10.4%
Table Salt 2.5%
Instant Yeast 1.2%
240 g
170 g
25 g
6 g
2.83 g
PIZZA INGREDIENTS
Shredded Whole or Part-Skim Mozzarella
Pizza Sauce
Garlic
Extra Virgin Olive Oil
Parmesan Cheese
794 g
25 g
(4 cloves) 65 g
17 g
To Taste
MAKING THE DOUGH
Weigh all of your ingredients.
In a medium bowl, whisk together the flour, salt, and yeast until well combined. Add the water and 25g of the oil. Mix until thoroughly combined and homogenous.
Cover the dough and place it in a warm spot (about 70°F to 75°F) for 15 minutes.
Perform a bowl fold: Uncover the dough and use a wet hand to grab a section of dough from one side, lift it up, then press it down into the middle. Repeat, turning the bowl 90° (a quarter turn) after each stretch, three to six times total, until the dough won’t elongate easily. Turn the dough over, placing it seam-side down in the bowl.
Cover and let it rest at room temperature for 15 minutes.
Repeat the bowl fold. After the second bowl fold, the dough should be smoother and feel tighter.
Cover the dough and allow it to rest at room temperature for 1 to 1.5 hours, until it’s slightly puffy but not necessarily doubled in size. (The dough can be covered tightly and transferred to the refrigerator to rest for 8 to 24 hours after the second bowl fold, before the room temperature rest.)
If refrigerated, remove the dough from the refrigerator and allow it to come to room temperature for 1 hour before proceeding with the recipe.
SHAPING THE DOUGH
Coat the inside of a 9 inch x 9 inch pan with the remaining 2 tablespoons (25g) olive oil, being sure to oil up the sides of the pan. Transfer the dough to the pan and turn it once to coat in oil.
Gently press and stretch the dough, using your fingertips to dimple the surface and encourage it to cover the entire pan. (If your dough resists, cover it, let it rest for 30 minutes, then try again.)
Cover the dough and let it rest for 1.5 to 2 hours, until the dough is visibly puffy and has filled the pan.
In the last 30 minutes of the rise time, preheat a high-heat countertop pizza oven to a medium-high temperature zone, 600°F to 700°F. Before baking, confirm the temperature of the oven using either the oven’s built-in thermometer, an infrared thermometer, or both.
BAKING DIRECTIONS
Use a baker’s peel to load the pizza into the oven, placing the pan as far from the heat source as possible. Immediately turn the heat to its lowest setting; if the lowest setting is still a powerful flame, turn the oven off completely. Bake for 4 to 5 minutes, rotating after 2 minutes. Bake until the dough is set and lightly golden in spots.
Remove the pan from the oven and gently loosen the dough from the sides and bottom using an offset metal spatula or dull knife. Gently lift and check the bottom crust for browning: It should be golden and crispy.
Sprinkle about two-thirds of the mozzarella around the edges of the dough where it meets the pan. Use the remaining mozzarella to cover the center of the dough with a light layer of cheese. (Concentrating the cheese on the pan’s edges gives you the maximum amount of crispy frico, the cheesy crust.) Add the pizza sauce in dollops on top of the cheese.
Return the pizza to the oven and bake on a low or turned-off setting for 4 to 6 minutes, rotating as necessary, until the cheese is crispy and golden brown at the edges and melted and bubbling in the center. It may be necessary to relight the oven or increase the heat towards the end of the bake in order to brown the top nicely.
Remove the pizza from the oven and transfer it to a wire rack. Immediately run a thin knife or offset spatula around the edges of the pan in order to prevent the cheese from cooling and sticking to the sides. Let the pizza cool for 5 minutes in the pan, then carefully transfer it to a wire rack to cool for at least 5 minutes. Grate Parmesan cheese over the top of the pizza, then slice and serve.

WEEKKNIGHT DETROIT PIZZA RECIPE
Yield
One 657g dough ball (10 inch x 14 inch Detroit-Style pizza)
Difficulty Level

Martin Philip is one of the authors of King Arthur Baking Company’s The Book of Pizza where you can find this recipe and many more!), published in May of 2026. Martin’s interest in baking is deeply tied to the intersection of food and community, exactly what we work to accomplish with Summer Slice-a-thon. This recipe was inspired by the original Detroit-style pizza developed by Gus Guerra and his mother-in-law Celia Passalaqua at Buddy’s Randezvous. Celia was featured in our Woman Who Made Pizza History project at the Las Vegas Pizza Tailgate.
The pizza features Detroit’s infamous thick crust and crackly-crisp sides (AKA frico), it also layers classic pizza toppings in reverse order: cheese first (brick cheese, to be totally traditional), then sauce. The sauce here is jammy, thick, and distinctly sweet. Could you use a different sauce? Technically, yes. But it wouldn’t be a Motor City Classic. Detroit pizza is traditionally baked in a special dark anodized pan to achieve perfectly crispy caramelized cheese around the edge; a harmonious balance to the soft, chewy crust, and sauce and gooey cheese on top. If you do decide to use store-bought tomato sauce, reduce on the stovetop until it reaches a thick consistency that can be dolloped rather than poured onto your dough.
Martin Philip, King Arthur Baking Company
Norwich, VT
Bakers Percentage
DOUGH INGREDIENTS
High-Gluten Bread Flour 100%
Lukewarm Water 70.8%
Extra Virgin Olive Oil 10.4%
Table Salt 2.5%
Instant Yeast 1.2%
240 g
170 g
25 g
6 g
2.83 g
SAUCE INGREDIENTS
Crushed Tomatoes
Extra Virgin Olive Oil
Garlic
Granulated Sugar
Table Salt
794 g
25 g
(4 cloves) 65 g
17 g
To Taste
TOPPING INGREDIENTS
Shredded Brick Cheese
Finely Grated Pecorino Romano Cheese
Cup-and-Char Pepperoni (optional)
Red Pepper Flakes (optional)
340 g
28 g
60 g
As Needed to Finish
MAKING THE DOUGH
In a large bowl, mix together the flour, salt, and yeast until well combined.
Add the water and oil. Mix until thoroughly combined and homogeneous; don’t be afraid to stir vigorously to incorporate the dry ingredients. If the dough feels dry, add up to an additional 14g of water.
Cover the dough and let it rest at room temperature for 15 minutes.
Perform a bowl fold: Uncover the dough and use a wet hand to grab a section of dough from one side, lift it up, then press it down into the middle. Repeat, turning the bowl 90° (a quarter turn) after each stretch, three to six times total, until the dough won’t elongate easily. Turn the dough over, placing it seam-side down in the bowl.
Cover and let it rest at room temperature for 15 minutes.
Repeat the bowl fold. After the second bowl fold, the dough should be smoother and feel tighter.
Cover the dough and allow it to rest at room temperature for 1 to 1.5 hours, until it’s slightly puffy but not necessarily doubled in size. (The dough can be covered tightly and transferred to the refrigerator to rest for 8 to 24 hours after the second bowl fold, before the room temperature rest.)
If refrigerated, remove the dough from the refrigerator and allow it to come to room temperature for 1 hour before proceeding with the recipe.
SAUCE INSTRUCTIONS
In a medium saucepan over medium heat, heat the oil until shimmering. Stir in the garlic and cook, stirring, until fragrant, about 30 seconds.
Add the tomatoes, sugar, and salt and bring to a simmer. Simmer, stirring occasionally, for about 20 minutes, until the sauce has reduced significantly; you should have about 724g of sauce.
Add additional salt to taste. Remove from the heat and let cool to room temperature. Use immediately or transfer to a lidded container and refrigerate for up to 5 days.
BAKING DIRECTIONS
Position a rack in the bottom third of the oven. Place a baking steel or stone on the rack and preheat the oven to 500°F.
Grease a 10” x 14” Detroit-style pizza pan or a 9” x 13” pan with oil. Transfer the dough to the pan and turn once to coat in oil.
Gently press and stretch the dough, using your fingertips to dimple the surface and encourage it to cover the entire pan. If the dough resists, cover it, let it rest for 30 minutes, and try again.
Cover the dough and let it rest for 45 to 60 minutes, until slightly puffy (there should be some bubbles on the surface and edges, but the dough will not have doubled in size).
Slide the pan onto the steel or stone and bake until the dough has set but has barely taken on any color, 10 to 12 minutes. Remove the pan from the oven.
TOPPINGS
Starting at the edges of the pan, sprinkle a thick layer of brick cheese where the dough meets the pan edge; it will sizzle on contact with the pan. Once you’ve made this cheese moat, distribute the remaining cheese across the interior of the dough.
Using about 300g of sauce (reserve the remainder for another use), spoon thick stripes on the diagonal on top of the cheese layer.
Distribute pepperoni on top, if desired.al optional toppings except for your sauce, pecorino romano, and basil.
Return the pizza to the oven and bake until the edges are deeply colored and crisp, 12 to 14 minutes.
Remove the pan from the oven and run a dull knife around the edge of the pan to loosen the pizza from the edge. With courage and conviction (and a large spatula to aid you), immediately slide the pizza out of the pan onto a wire rack (this will prevent it from steaming in the pan and losing its crisp crust). Let cool for a few minutes, then sprinkle with the pecorino and red pepper flakes, if using. Transfer to a cutting board and cut into squares.
TOPPING
Recipes
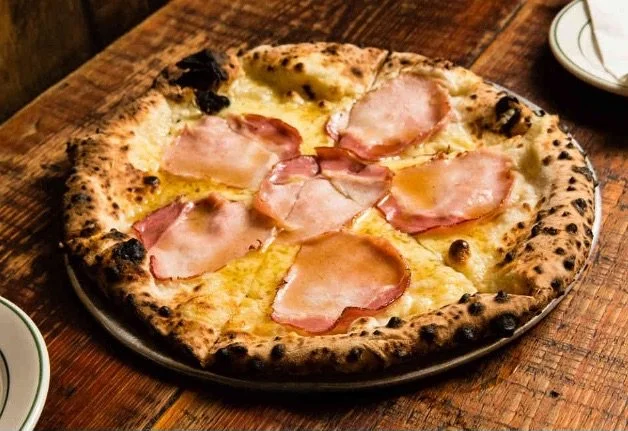
Monte Cristo Pizza
Yield
Difficulty Level
One pie (12 inch pizza)
Photo credit Cole Saladino
Mary Ann and Paulie Giannone of Paulie Gee’s are two Brooklyn natives who care as much about community as they do about pizza. Their book Pizza From the Heart is all about bringing the hospitality of their restaurants into your home kitchen. Their brand has spread to several wood-fired pizzerias and slice shops in New York City, Chicago, Columbus, and Philadelphia. This recipe can be made in any type of oven with the dough style of your choice and ingredients that you can pick up at a grocery store.
Mary Ann & Paulie Giannone, Paulie Gee’s
Brooklyn, NY

INGREDIENTS
Shredded Gouda Cheese
Canadian Bacon
Maple Syrup
60 g
Approx 6 slices
As Needed
Heat up your oven and prepare your baking surface as recommended based on your dough style (see Dough Recipes for details.)
Scatter the gouda cheese over the dough, then space the Canadian bacon slices evenly over the pie.
Bake for 1 minute or until the crust is evenly brown and crisp until the cheese begins to brown slightly.
Drizzle maple syrup over the top before slicing and serving.

Ruben Pizza
Yield
Four pies (12 inch pizzas)
Difficulty Level
Serhan Ayhan of Next Level Pizza is a Queens-based home pizza-maker and pop-up extraordinaire. He learned all the ins and outs of pizza at an early age, growing up in his parents’ pizza shop, and likes to craft pies with influences from both his Queens upbringing and Turkish heritage. This Ruben Pizza recipe is his take on translating the NYC Jewish Deli experience to pizza. It can be made in any oven with the dough style of your choice and ingredients that you can pick up at a grocery store.
Serhan Ayhan, Next Level Pizza
Queens, NY

RUSSIAN MARINARA SAUCE
Crushed Tomatoes
Tomato Paste
Worcestershire Sauce
Lemon Juice (or White Vinegar)
Mayonnaise
Dijon Mustard
Paprika (or Chili Powder)
Salt
Pepper
340 g
115 g
14.5 g
14.5 g
13.5 g
13.5 g
1.4 g
To Taste
To Taste
Combine all ingredients and blend until smooth. If available, transfer to a squeeze bottle with a large spout. Use 85-90 grams (about ⅓ cup) per pizza.
TOPPING INGREDIENTS
Corned Beef (or Pastrami)
Sauerkraut
Shredded White Cheddar
Swiss Cheese (Broken into Pieces)
Shredded Low Moisture Mozzarella
Celery Salt
340 g
340 g
240 g
200 g
80 g
As Needed
Heat up your oven and prepare your baking surface as recommended based on your dough style (see Dough Recipes for details.)
Add your shredded cheese, going to the edges of the crust. Next, add the sliced Swiss cheese, breaking it apart for even coverage throughout the pie, and then add the sauerkraut.
Crumble the corned beef into pieces over the pie. This should be the final topping both for the aesthetics of the pizza and to allow the fats to meld with the other ingredients.
Do not overload the pizza or it will not properly bake (less is more – especially if you want a crispier pizza.)
Once sliced, finish with the Russian marinara and a dusting of celery salt.

White Mushroom Pizza
Yield
Four pies (12 inch pizzas)
Difficulty Level
Auggie Russo operates pizza pop-ups all over NYC under the name Tiny Pizza Kitchen. He’s been featured in the NY Times, which praised him for his use of market fresh ingredients and flavor complexity. He encourages home pizza-makers to use the recipe provided as is or to use it as a jumping off point to feature whatever produce is in season. It can be made in any type of oven with the dough style of your choice and ingredients that you can pick up at a grocery store.
Auggie Russo, Tiny Pizza Kitchen
Brooklyn, NY

INGREDIENTS
Mushrooms (Your Choice, Cleaned & Sliced)
Low Moisture Whole Milk Mozzarella
Fresh Mozzarella
Grated Pecorino and Parmigiano Reggiano Blend
Panko Bread Crumbs
Butter
Extra Virgin Olive Oil (High Quality, Fresh)
Fresh Thyme
Garlic
Scallions
Flat Leaf Parsley
Lemon Zest
Kosher Salt
Crushed Red Pepper
Black Pepper
1200 g
472 g
236 g
170 g
150 g
76 g
48 g
6 sprigs
4 cloves
6 stalks
As Needed
To Taste
To Taste
To Taste
To Taste
Mushrooms: Clean and slice your favorite mushrooms and set aside. Add EVOO to a mixing bowl with one minced clove of garlic, fresh thyme, crushed red pepper, salt, and cracked pepper to taste. Mix with a fork to blend and toss with your mushrooms.
Salted Garlic: Finely mince three cloves of garlic and cover in kosher salt. Allow the garlic and salt to rest for 15 minutes to soften.
Panko: Toast panko bread crumbs in a cast iron pan or hot oven with butter, cracked black pepper, fresh thyme (use 2g, a quarter of your thyme), and salt. You want a nice golden brown so keep an eye on this part of the process.
Zest your lemon right onto the stretched dough. Next add salted garlic to taste, some fresh thyme, crushed red pepper to taste, pecorino and parmesan mix, and a drizzle of EVOO.
Add low moisture and fresh mozzarella, your herbed mushrooms, a little more pecorino and parmesan and a drizzle of oil before baking.
Finish with more pecorino and parmesan, EVOO, toasted panko, chopped flat leaf parsley, and more lemon zest.

Ken’s Folded Margherita-Arugula Pizza
Yield
One pie (12 inch pizza)
Difficulty Level
Ken Forkish has made several successful career shifts during his life, beginning in tech, to founding Ken’s Artisan Bakery in Portland, and is now writing full time. He has published several highly successful culinary books including Flour Water Salt Yeast and The Elements of Pizza. The recipe that he has provided is a long-standing favorite going back to his days of doing bakery pop-ups in 2005. It can be made in any sort of oven with the dough style of your choice and ingredients that you can pick up at a grocery store.
Ken Forkish, Ken’s Artisan Pizza
Portland, OR

INGREDIENTS
Fresh Mozzarella (Cut ¼ inch thick x ½ inch length)
Tomato Sauce
Arugula
Pecorino Romano (or Parmigiano-Reggiano)
Soppressata Thinly Sliced (2 inches squared)
Extra Virgin Olive Oil
Fresh Basil
Fine Sea Salt
110 g
90 g
60 g
15 g
18 slices
As Needed
To Taste
To Taste
Top the pizza with sauce, sprinkle the grated hard cheese on top, then add torn or cut basil leaves (small pieces), and cover with the mozzarella and bake.
Toss the arugula in olive oil add a sprinkle of salt
As soon as the pizza is out of the oven, place the pile of arugula and Soppressata on top.
Using a large chef's knife or a big mezzaluna, crease the pizza down the middle, but don’t cut it. Fold the pizza in half.
An alternative version of this recipe is to dress the pizza with arugula and Sopressata and fold it before baking making it a calzone.

Sprouts n’ Snouts Pizza
Yield
One pie (12 inch pizza)
Difficulty Level
Jenny & Mark Bello are the founders of Pizza School NYC which is now entering its 14th year. They have taught thousands of home chefs from all over the world the ins and outs of making pizza at home, have been featured on the Today Show, and invited to Talks at Google. The recipe they have provided can be made in any sort of oven with the dough style of your choice and ingredients that you can pick up at a grocery store.
Jenny & Mark Bello, Pizza School
New York, NY

INGREDIENTS
Whole Milk Ricotta
Thick Sliced Pancetta (or Bacon)
Fresh Salted Whole Milk Low Moisture Mozzarella
Grated Pecorino Romano
Extra Virgin Olive Oil
Chilled Cubed Unsalted Butter
Raw Shredded Brussel Sprouts
Garlic
Lemon Zest
Freshly Ground Black Pepper
113 g
57 g
43 g
23 g
9 g
7 g
2 sprouts
1 clove
1 lemon
To Taste
Finely mince or grate your garlic. Then mix garlic, ricotta, butter cubes, brussels sprouts, and olive oil together and set aside.
Tear mozzarella into little nuggets and scatter about your stretched dough.
Apply roughly a tablespoon of ricotta mixture in the center of your dough. Evenly space 6-8 spoonfuls of the ricotta mixture throughout your pizza, careful to apply at least 3 inches in from the perimeter of your pizza. No need to spread; the ricotta mix will melt and uniformly spread-out as the pizza bakes. Additionally, leaving open spaces as your pizza bakes makes for a better cooked crust.
Evenly distribute bits of pancetta and sprinkle pecorino evenly over the pie extending all the way to the outer perimeter of the crust. Toasty bits of cheese on the outer edge of the pizza means fewer "bones" (that's pizzeria lingo for the discarded crust ends) to clean up after your pizza party.
While still very hot out of the oven, garnish with freshly grated lemon zest and fresh ground black pepper.
Pizza &

WINE

“ A good pizza wine cuts the salty, fatty intensity of toppings like cheeses and meats.”

Andrea Card, Director of Winemaking
Francis Ford Coppola Winery
TIPS AND MUSINGS
By Andrea Card, Director of Winemaking, Francis Ford Coppola Winery
In the math of flavor harmonies, one plus one equals three when it comes to wine and pizza. But not all wines work with all pizzas. A wine should enhance a pizza without overwhelming it. A good pizza wine cuts the salty, fatty intensity of toppings like cheeses and meats. It sings with the fruity sweetness of a tomato sauce, tames the sharpness of bitter greens, accentuates the earthy umami from mushrooms and olives and plays to the bright green top notes of basil (or any herbs you scatter).
Maybe most important, a good pizza wine finishes with a harmonious hum of flavors that lingers like the echo of a great song, then scrubs the palate clean. Each sip of wine should end with a freshness that begs for the next bite of pizza. Pizza wines are all about the middle way: They’re neither too light nor too heavy, too complex or too simple. They are the wines Goldilocks would have chosen, if she were all grown up (and able to legally drink alcohol.)
The six following combos are a good place to start. In general, match the weight and intensity of the wine to the toppings. Pizzas with intense, protein-rich toppings can handle bigger wines; lighter pizzas need fresher, lighter wines. Meaning, in pizza and wine—as in life—balance is key.

SIX GO-TO WINE AND PIZZA PAIRINGS
Margherita + Prosecco
Prosecco is a star utility player in the pizza pairing game, complementing everything from seafood and white pies to spicy pepperoni. It’s a superb match with a Margherita in particular, because it lets the pie’s delicate flavors shine.

Veggie + Sauvignon
Blanc Sauvignon Blanc’s bright acidity and grassy notes echo the freshness in veggie- topped pizzas and won’t overwhelm them, either. Pies with bell peppers, fresh herbs, green vegetables, pesto and leafy greens such as spinach and arugula will shine with a zesty Sauvignon Blanc.
White Pizza + Chardonnay
The nutty, lactic notes from fresh and aged cheeses are divine with a glass of creamy, smooth Chardonnay.

Cheese + Sangiovese or Pinot Noir
Juicy, medium-bodied reds with midweight fruit and an herbaceous edge— such as Pinot Noir and Sangiovese (the star grape of Italy’s Chianti region) partner beautifully with a classic cheese pie.

Meat Lover’s + Cabernet Sauvignon
Find a medium-bodied Cabernet Sauvignon that’s not too tannic; its structure gives it the oomph to cut the fatty, salty heft of meats like pepperoni and sausage.

Seafood + Pinot Grigio
For pizzas that feature seafood and that skip the tomato sauce in favor of a white sauce or olive oil and herbs, the relatively neutral flavors of Pinot Grigio make a great match.
Pro tip: If there’s a tomato sauce base, reach for a crisp rosé or Prosecco instead.


For more deep pizza thoughts (and some killer pizza recipes), check out Francis Ford Coppola Winery’s Perfect Your Pizza page.

PRIZES
We've partnered with incredible ingredient producers to help alleviate the cost of running your Summer Slice-a-thon party.
At the end of summer, our partners will be shipping out some pizza-making essentials to all participants who raised $100+ to replace some of the ingredients you used during your party. This will include goodies from:

WITH SUMMER SLICE-A-THON, EVERYONE’S A WINNER


3
WAYS TO WIN
Be entered to to win prizes provided by our wonderful sponsors. Browse below for the criteria eligable to win and their corresponding winning prizes.
MOST DOUGH
Prize
King Arthur prize package:
A year’s worth of flour
One-on-one virtual pizza consultation with Baking Ambassador, Martin Philip
The Book of Pizza and pizza accessories
How to Win
Raise the most money throughout the summer.
BIGGEST BASH
Prize
Ooni oven prize package:
Koda 2
Two 12” peels
Thermometer
How to Win
Host the biggest Summer Slice-a-thon party. Winner will be calculated based on the most individual donors who pay through the donation link we provide.
MOST PIZZAGRAM WORTHY
Prize
Francis Ford Coppola prize package:
Francis Coppola’s book “Live Cinema & Techniques”
Movie memory game
Pizza and wine accessories
How to Win
The pizza-maker who has the highest engagement on a post about Summer Slice-a-thon.
To be eligible, you must: Host your pizza party and tag @sliceouthunger & #SummerSliceaThon. Engagement will be calculated based on the combined number of likes & comments on a post.

Going Further
Summer Slice-a-thon perfectly coincides with the Francis Ford Coppola Winery’s exciting “Perfect Your Pizza” contest. See contest details here.
Perfect your pizza-making skills while doing #Pizza4Good then nominate your best original pizza recipe and Coppola wine pairing for a chance to win $10,000.

